Version 1.2 14 Aug 2022 Approx 0.9 MB (zipped) First Published 14 Oct 2022
To prevent users editing any data on a form, you can make the form read only by setting the Allow Additions / Allow Deletions / Allow Edits poperties to No in the form's property sheett
When you want to restrict users' ability to edit the content of selected form controls, there are three options available to you:
1. Hide the control (Me.ControlName.Visible = False) - the control is invisible to end users with a space on the form where the control is located
2. Lock the control (Me.ControlName.Locked = True) - users see a control that looks 'normal' but cannot edit its contents
3. Disable the control (Me.ControlName.Enabled = False) - users see a control that may appear 'greyed out' and again cannot edit its contents
The best approach will depend on what your users need:
a) All control types can be hidden. If users don't need to see the control contents, then hiding them is usually the best approach. However, if several controls are hidden, the spaces left on the form may make it look 'wrong'
b) Many control types can be locked (but not all). Locking the controls works well but users may get frustrated trying to edit the controls which don't respond
c) Most control types can be disabled (but not all). Disabling the controls has the advantage of making most types of control look different. However users with poor eyesight may have difficulty reading the control contents
You can of course combine these control properties so that controls are both locked and disabled. Is this necessary or useful?
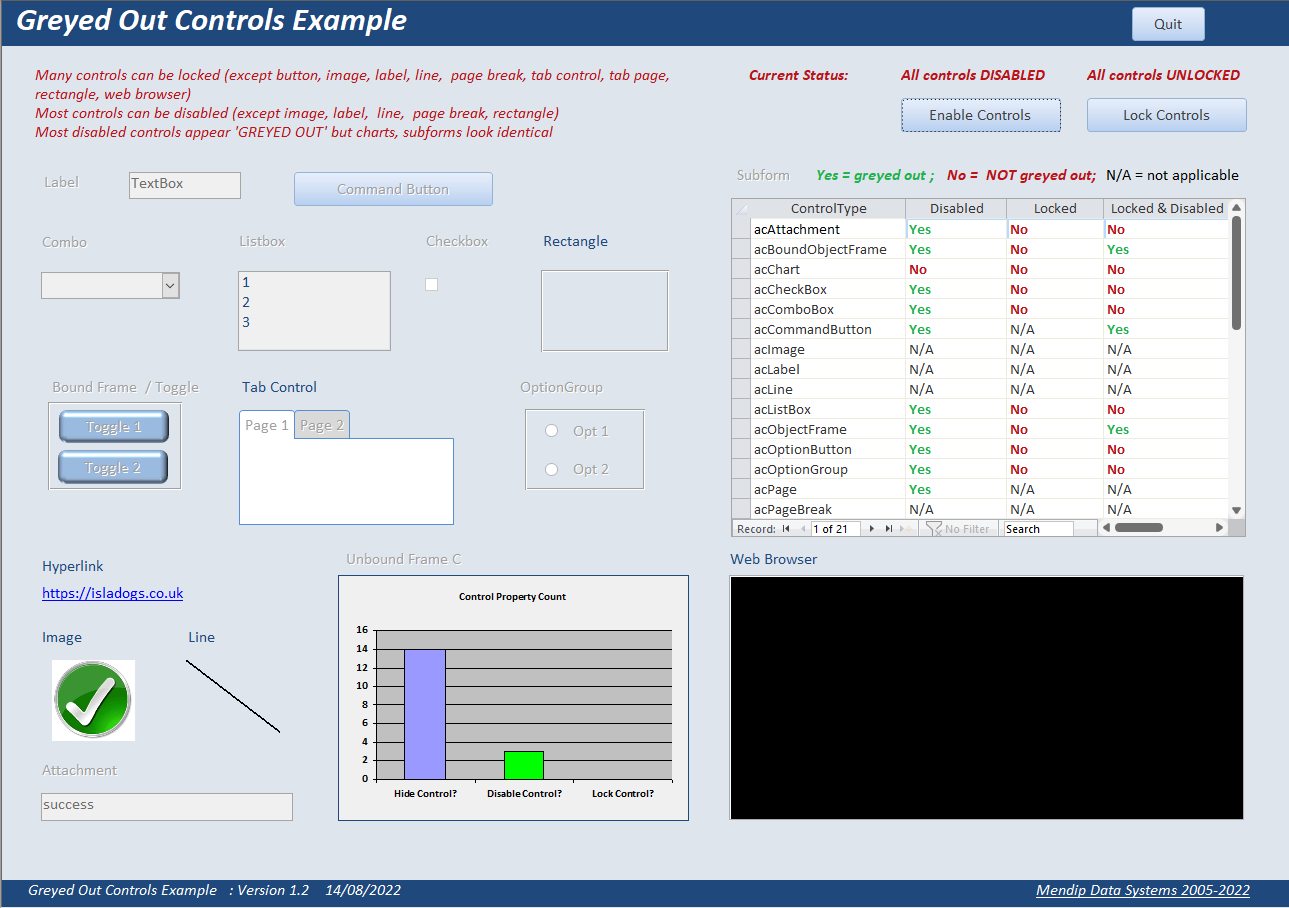
The screenshot below shows the effect of disabling or locking controls as well as doing both of those together.
All 21 standard (non-ActiveX) control types are listed.
KEY: Yes = 'greyed out' ; No = NOT 'greyed out' ; N/A = not applicable

With 3 exceptions, controls that are both disabled and locked are NOT 'greyed out'. In other words, these look 'normal'.
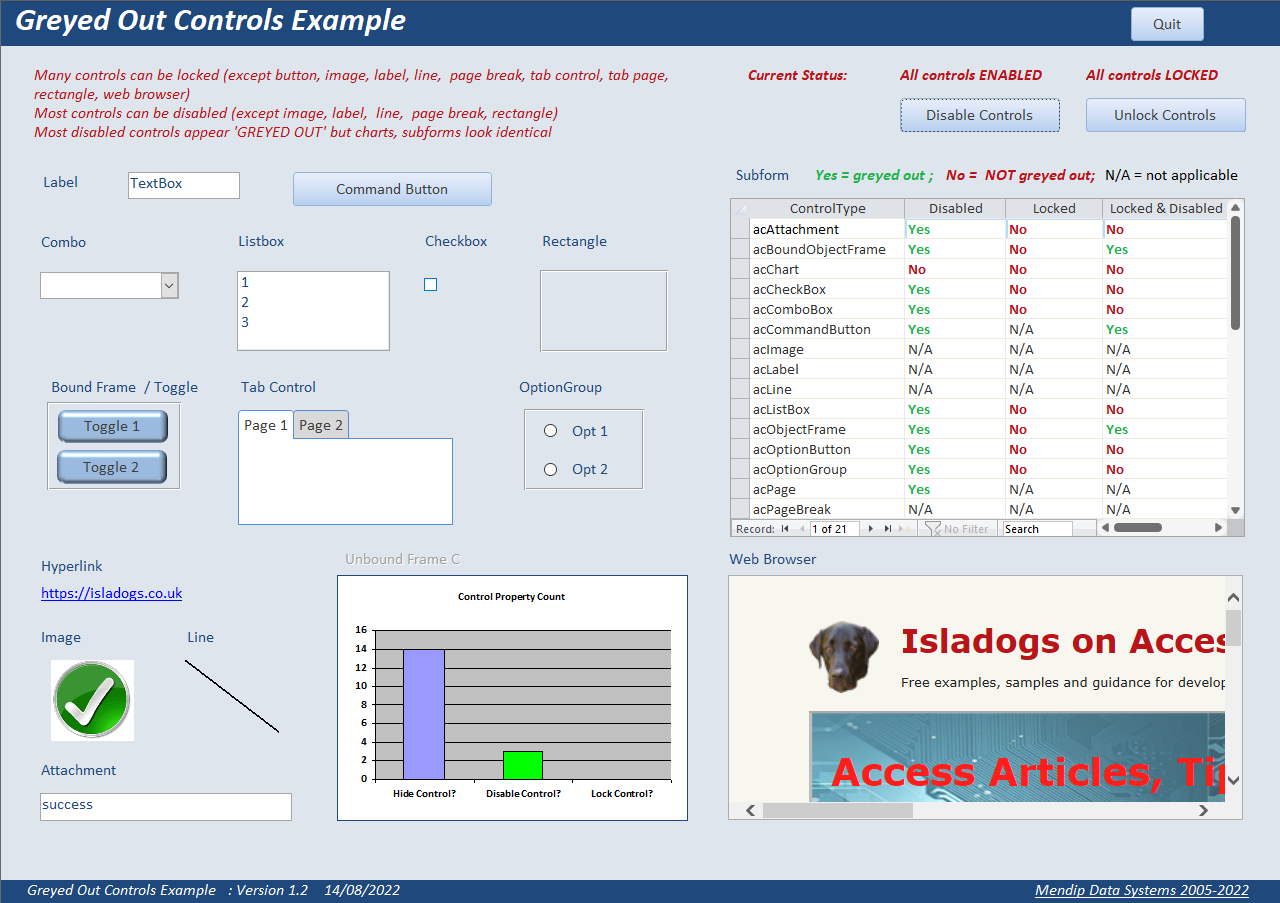
The screenshots below show the main form from the attached example app with a large selection of control types.
In the first image, all controls are enabled and unlocked

In the next image, all controls have been disabled (where possible). The 'greyed out' appearance is shown
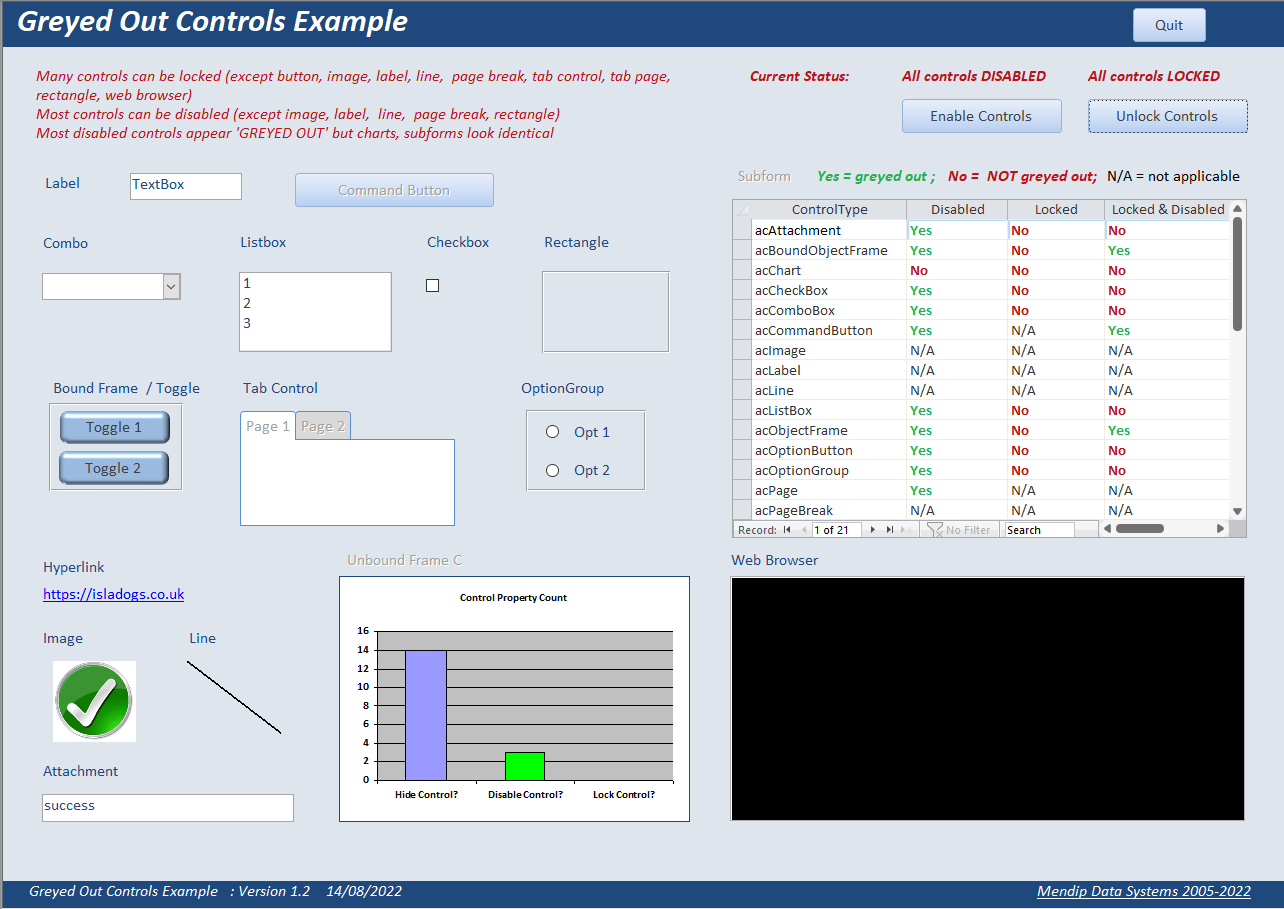
In the next image, all controls have been locked(where possible). The controls look 'normal'
Finally, all controls have been disabled and locked (where possible). Almost all controls look 'normal'
TLDR: In general, there is no benefit in applying both actions

Download
Click to download the example app: GreyedOutControls_v1.2 approx 0.9 MB (zipped)
Please use the contact form to let me know whether you found this article / example app useful or if you have any questions.
Colin Riddington Mendip Data Systems Page Last Updated 14 Oct 2022
|
Return to Example Databases Page
|
Return to Top
|