Version 3.0 Last Updated 8 Mar 2023 Approx 1 MB (zipped)
Section Links:
Access Split Forms
Issues with Split Forms
Build Your Own Simulated Split Form
Download
The Emulated Split Form
Feedback

This is a companion to my other article on split forms: Split Form Issues
1. Access Split Forms
Return To Top
The built-in Access split form provides two views of your data at the same time — a Form view and a Datasheet view.
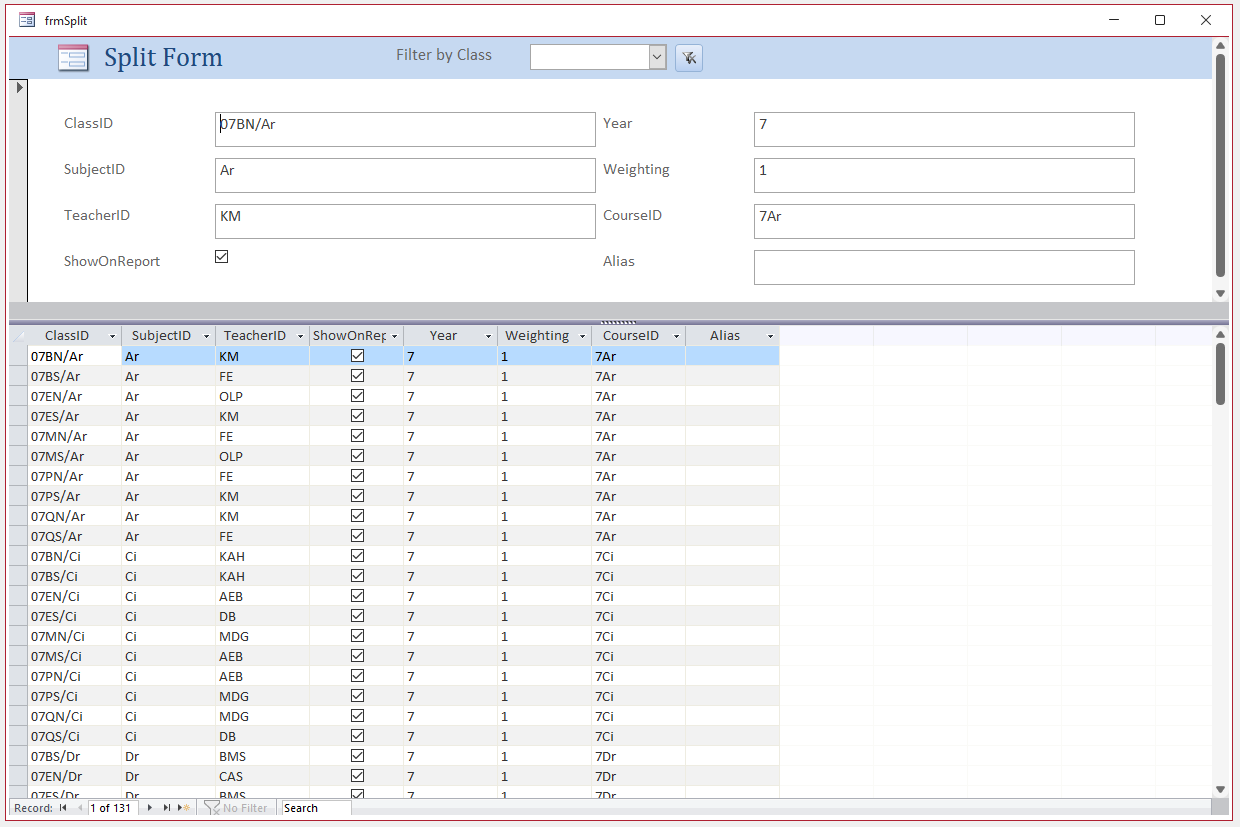
The two views are connected to the same data source and are synchronized with each other at all times.
Selecting a field in one part of the form selects the same field in the other part of the form.
You can add, edit, or delete data from either part (provided the record source is updateable and you have not configured the form to prevent these actions).
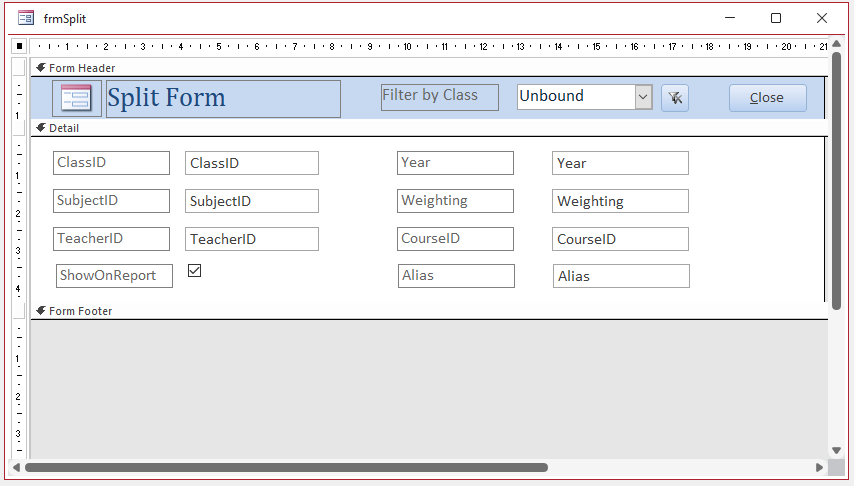
Despite its appearance, looking at the design view, shows it is a modified single form

2. Issues with Split Forms
Return To Top
Although split forms often appeal to new Access users, like many experienced developers, I avoid them completely due to their limitations
I abandoned the use of split forms a long time ago as they are difficult to adapt if you want to modify them in any significant way.
For example, limitations with standard split forms include:
a) Display issues
• Form size is uncontrollable in overlapping windows display. When the form is reopened, the height and width are always larger than needed.
Disabling the splitter bar doesn’t help
• Using a split form in a subform fails. Only the single form section is shown.
• Dragging the split form controls to a tab control MAY work OK but see below
• Placing any object such as a label or subform in the unused form footer section is allowed but causes problems.
The form footer items are displayed over the single form controls and partially or wholly cover them. Placing the subform in a tab control doesn’t solve this issue.
• Split forms don’t behave properly with automatic form resizing code unless the splitter bar is disabled
b) Runtime issues
• By design, users can resize/move/hide/unhide/delete datasheet fields at runtime. This can, of course, be useful, particularly in a standalone datasheet form.
However, this can be confusing in a split form where the single form section can only be altered in design view.
• Despite this, the single form can be altered by changes to the datasheet section.
For example, a user right clicks on a datasheet field and, possibly unintentionally, clicks Delete instead of the adjacent menu item, Hide Fields.
The corresponding label in the single section immediately disappears (though not the textbox).
If the changes are saved, the textbox control is also removed from the single form section on reopening as the form’s record source has been changed.
• Changing the datasheet properties to Read Only does NOT prevent this. Doing that stops data changes in the datasheet whilst allowing them in the single form
The right click context menu still allows fields to be deleted.
• Setting the form shortcut menu to No removes the context menu and solves this issue, but also affects the single form section.
c) Code issues
• Missing code context menu
• From memory, there are (or were) several other code issues but with all the above I’m not sure it matters too much how many other code issues remain

Please see my article: Split Form Issues for more details about each of the above issues.
If you like the split form layout but are frustrated by its limitations, an alternative approach is to build your own simulated split form using a single form with a datasheet (or continuous) subform. This can have almost exactly the same functionality without any of the above drawbacks.

3. Build Your Own Simulated Split Form
Return To Top
There are FOUR possible layouts:
a) First create two copies of the same form - single and datasheet. Add the datasheet form as a subform of the single form.
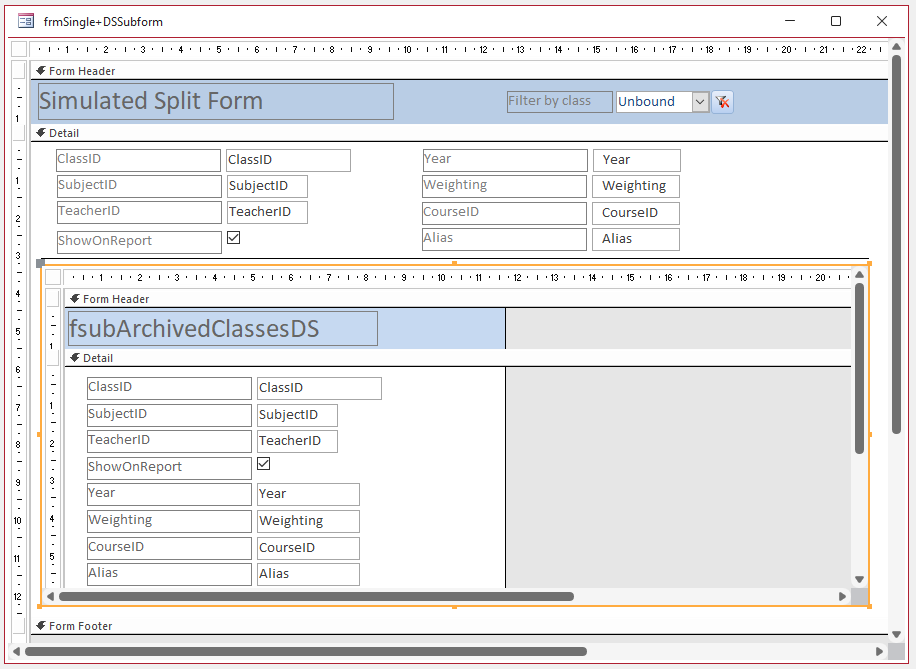
IMPORTANT: Do NOT link the subform to the main form using parent/child fields.
Add code similar to this to the main (parent) form:
Private Sub Form_AfterUpdate()
'use actual name of your subform control
Me.fsubArchivedClassesDS.Requery
End Sub
'------------------------------------------------
Private Sub Form_Current()
'use actual name of your subform control
If Me.NewRecord Then
Me.fsubArchivedClassesDS.Form.Recordset.AddNew
Else
Me.fsubArchivedClassesDS.Requery
End If
End Sub
Next add code similar to this to the sub (child) form:
Private Sub Form_AfterUpdate()
Me.Parent.Form.Requery
End Sub
'------------------------------------------------
Private Sub Form_Current()
Dim pk_field As String, pk_tbox As control
Dim primaryKey As String, strSearch As String
Set pk_tbox = Me.ClassID 'use name of textbox containing primary key
pk_field = "ClassID" 'use your primary key field name
'NOTE: the code below assumes the primary key is a short text field
'Amend as shown if the primary key is a number/autonumber field
primaryKey = Nz(pk_tbox.Value, "") 'for text field - change value to an empty string if null
'primaryKey = Nz(pk_tbox.Value, 0) 'for number field - change value to 0 if null
pk_field = "[" & pk_field & "]" 'enclose field name with brackets
If primaryKey <> "" Then 'if not null (or not a new record) - replace "" with 0 for number field
strSearch = pk_field & "='" & primaryKey & "'" 'for text PK field
'strSearch = pk_field & "=" & primaryKey 'for number PK field
Me.Parent.Recordset.FindFirst strSearch
Else
Me.Parent.Form.Recordset.AddNew
End If
End Sub
The above code will ensure the main form and subform remain synchronised
Add an unbound combo box to the main form to filter the records and a button to clear the filter
Private Sub cboClassID_AfterUpdate()
Me.Filter = "ClassID = '" & Me.cboClassID & "'"
Me.FilterOn = True
cmdClearFilter.Enabled = True
Me.fsubArchivedClassesDS.Form.Filter = "ClassID = '" & Me.cboClassID & "'"
Me.fsubArchivedClassesDS.Form.FilterOn = True
End Sub
'------------------------------------------------
Private Sub cmdClearFilter_Click()
Me.Filter = ""
Me.cboClassID = ""
Me.FilterOn = False
cmdClearFilter.Enabled = False
Me.fsubArchivedClassesDS.Form.Filter = ""
Me.fsubArchivedClassesDS.Form.FilterOn = False
End Sub
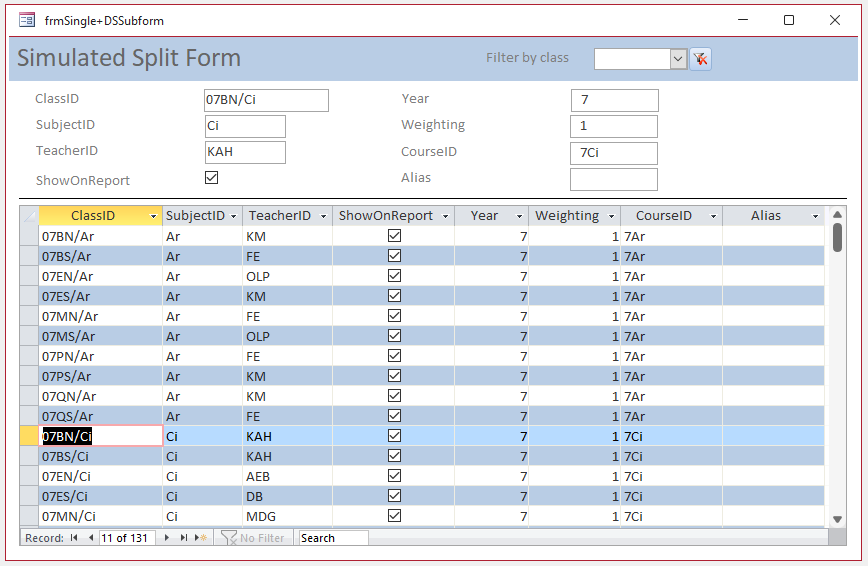
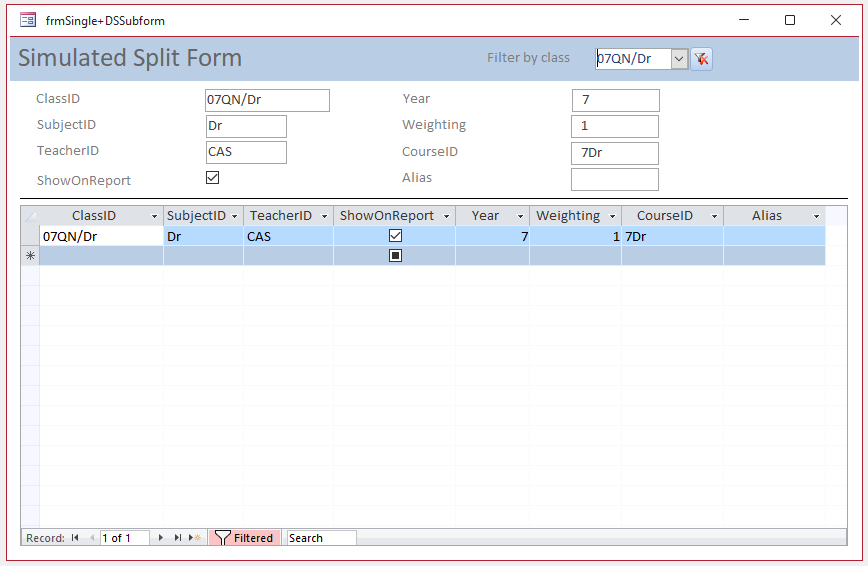
In form view, the form will look very similar to the standard split form:
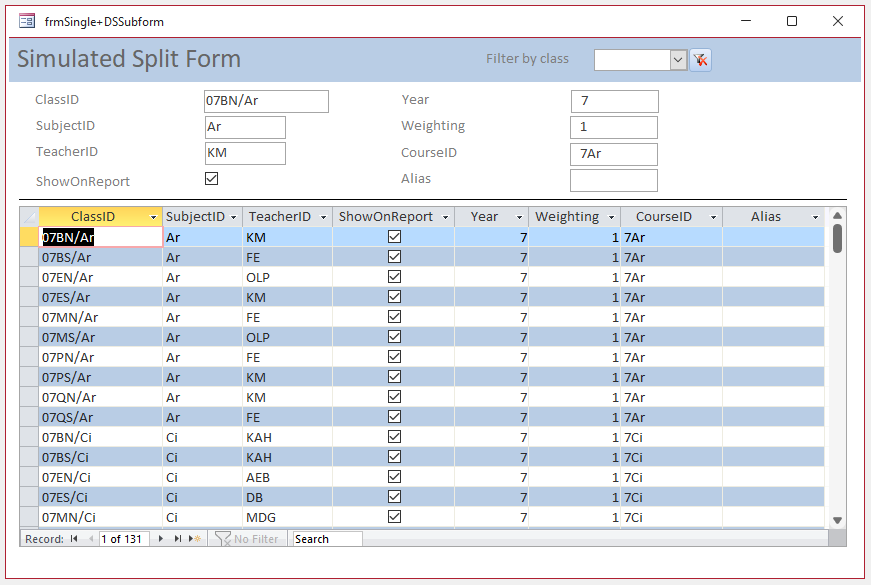
Select an individual record using the navigation buttons or the record selector on the datasheet subform
Filter for an individual record using the combobox
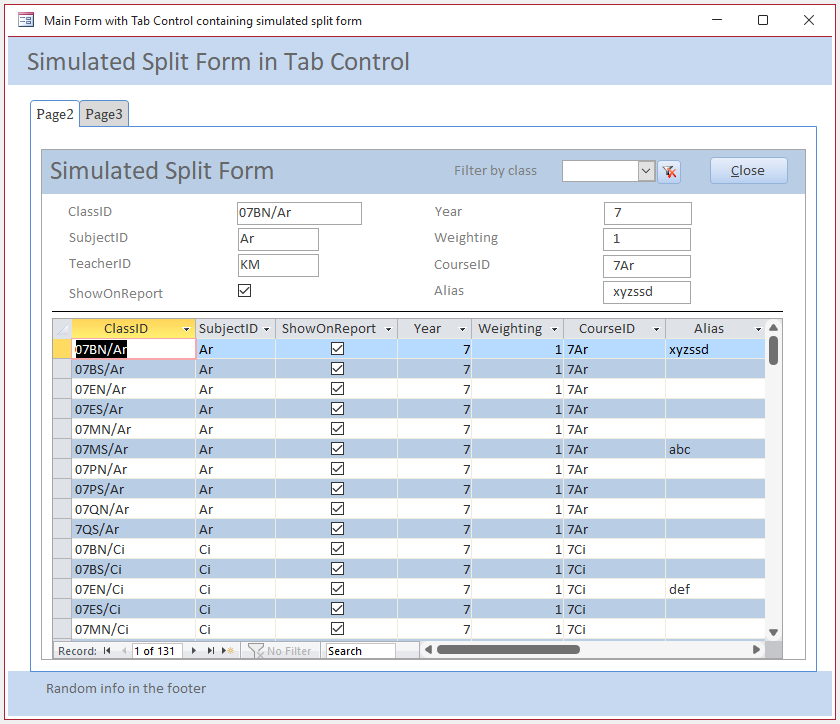
Unlike the standard split form, the simulated split form can also be used as a subform, in a tab control and with an object in the form footer section

b) Alternatively, you can use an continuous subform. This gives you greater control over the appearance of the form
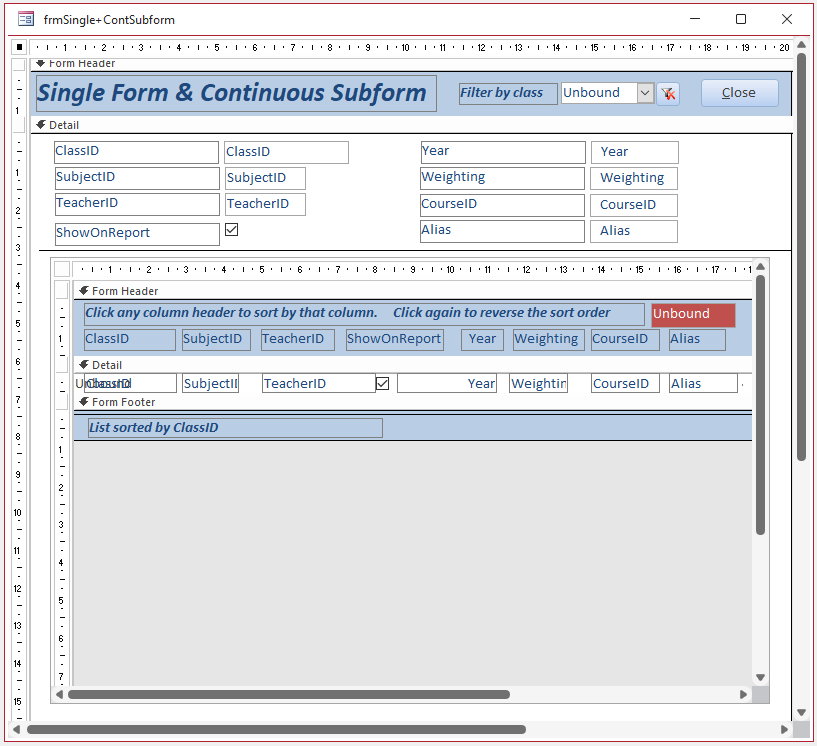
Code is used to highlight the currently selected record
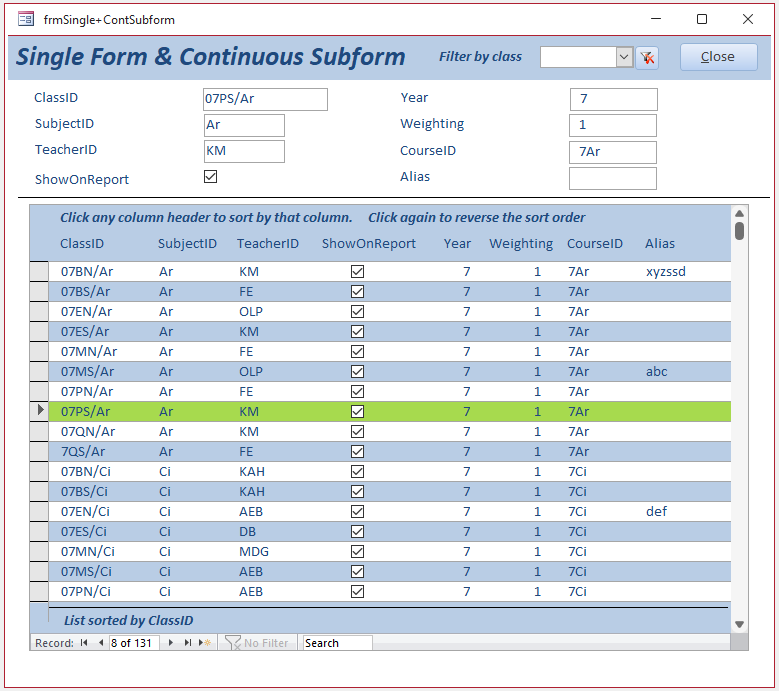
Additional code has been used to allow column sorting in the subform (as for datasheets)
c) Another variation uses a continuous form with a single form section in the form footer
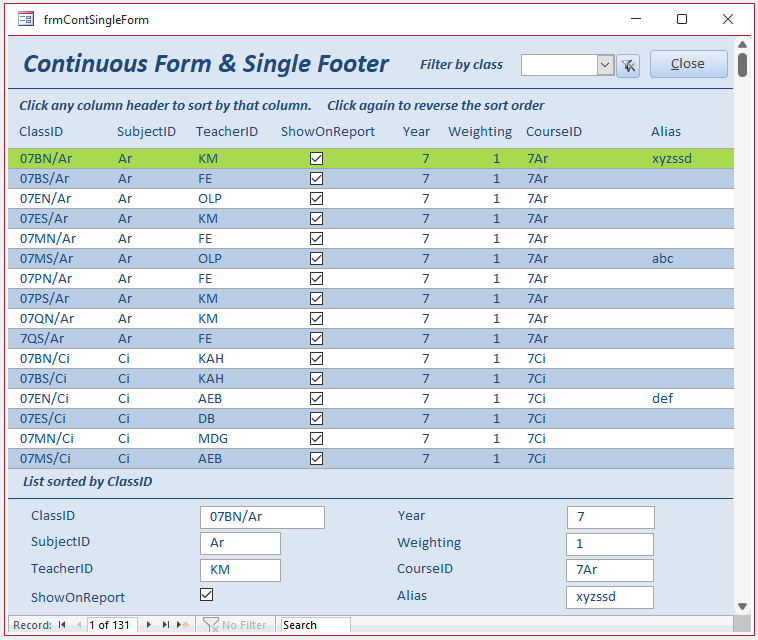
d) Finally, you can have a single form in the form header section with a continuous form section in the detail section
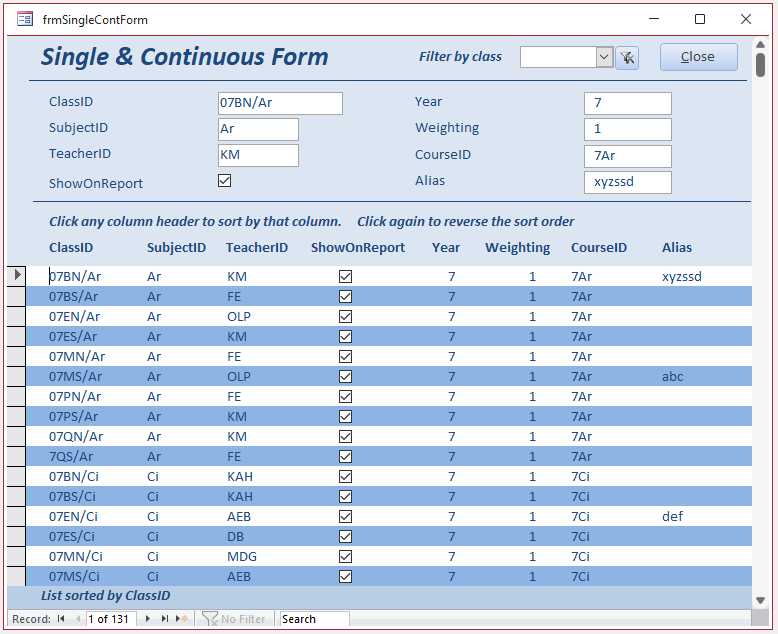
However, unlike datasheets, the columns in a continuous form/subform can only be moved or hidden in design view

4. Download
Return To Top
The example app opens to a start form giving easy access to each of the main forms:
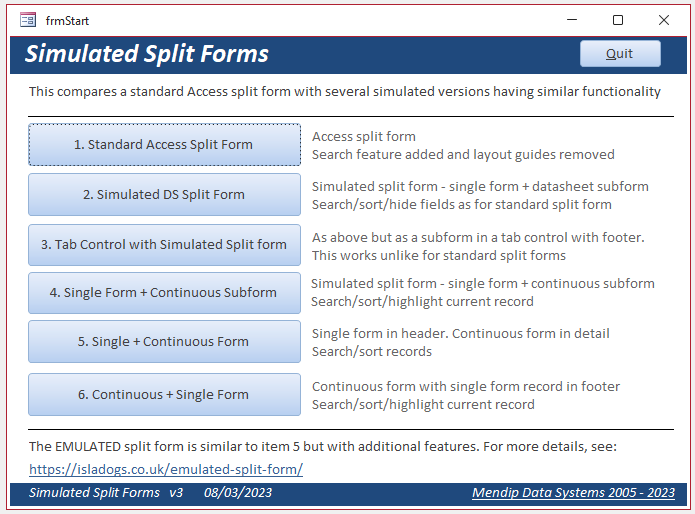
Click to download: Build Split Form v3.0 Approx 1MB (zipped)

5. The Emulated Split Form
Return To Top
Another approach is to use an emulated split form which includes both single and continuous sections in the SAME form
One advantage of that approach is that code is not required to keep the two sections synchronised as they are both part of the same form
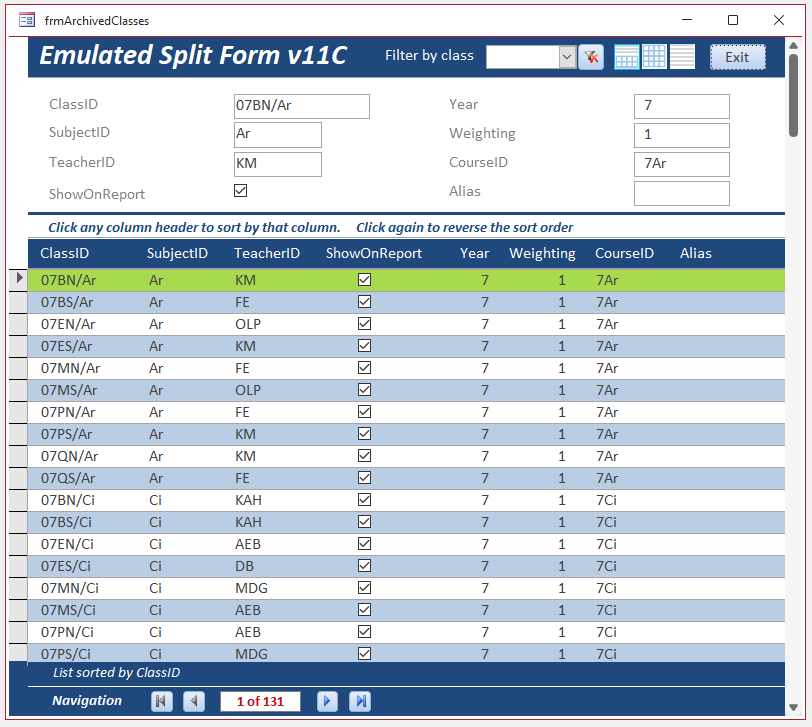
For further details and an example app with all code, see my companion article: The Emulated Split Form

6. Feedback
Return To Top
Please use the contact form below to let me know whether you found this article interesting/useful or if you have any questions/comments.
Please also consider making a donation towards the costs of maintaining this website. Thank you
Colin Riddington Mendip Data Systems Last Updated 8 Mar 2023

|
Return to Example Databases Page
|
Return to Top
|