Version 1.9 Approx 1.9 MB (zipped) First Published 27 Feb 2024
Section Links (this page):
Introduction
Download
Using the Example App
How Does the Example App Work?
Version History
More Continuous Forms Examples
Feedback

Introduction
Return To Top
This is the first part of the tenth article in my series showing how functionality can be added to continuous forms.
In this article, I will demonstrate how users can move, resize, hide and restore columns in a continuous form at runtime.
Once again, no APIs are used for the basic functionality of this application.
APIs are used as part of the optional dim background effect used with subsidiary forms frmAppTips & frmSettings.
No additional references are required if late binding is used.
Download Return To Top
Click to download: MoveResizeColumns_v1.9 ACCDB file Approx 1.9 MB (zipped)
Using the Example App Return To Top
Once again, the app opens to a startup form:
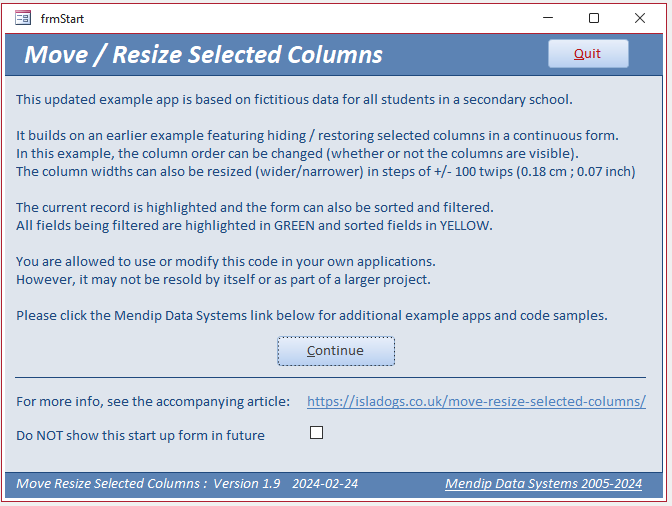
Click Continue to open the main (continuous) form.
This is the main form in design view
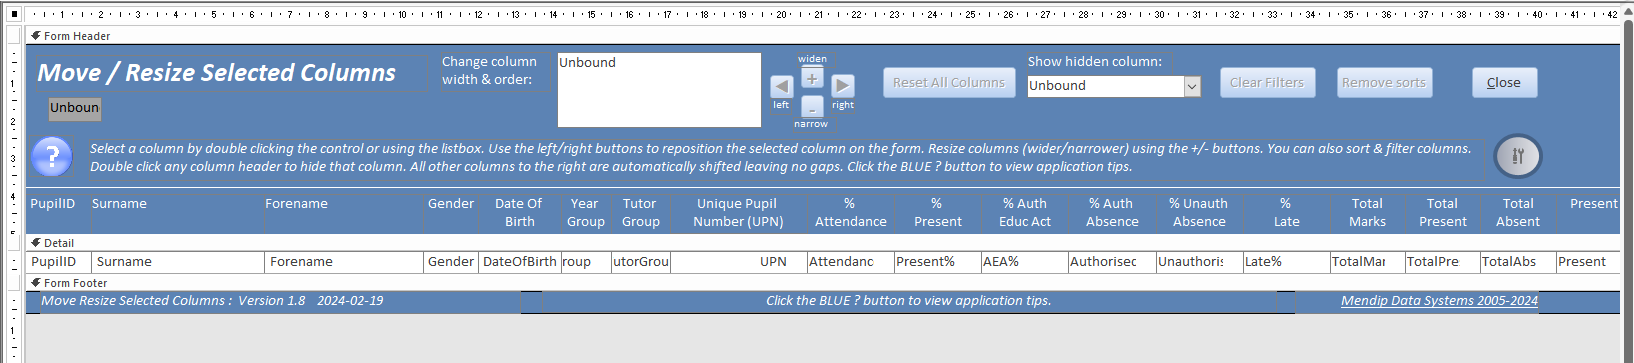
The form includes several features already described in detail in earlier articles in the series. I won't explain these again here.
For a detailed explanation and code for those items, see the linked articles:
a) Highlight Current Record
b) Highlight Filtered Columns
c) Highlight Sorted Columns
d) Hide & Restore Selected Columns
e) Multiselect Filter
f) Get Control Positions & Sizes Using Accessibility Code
g) Dim Background
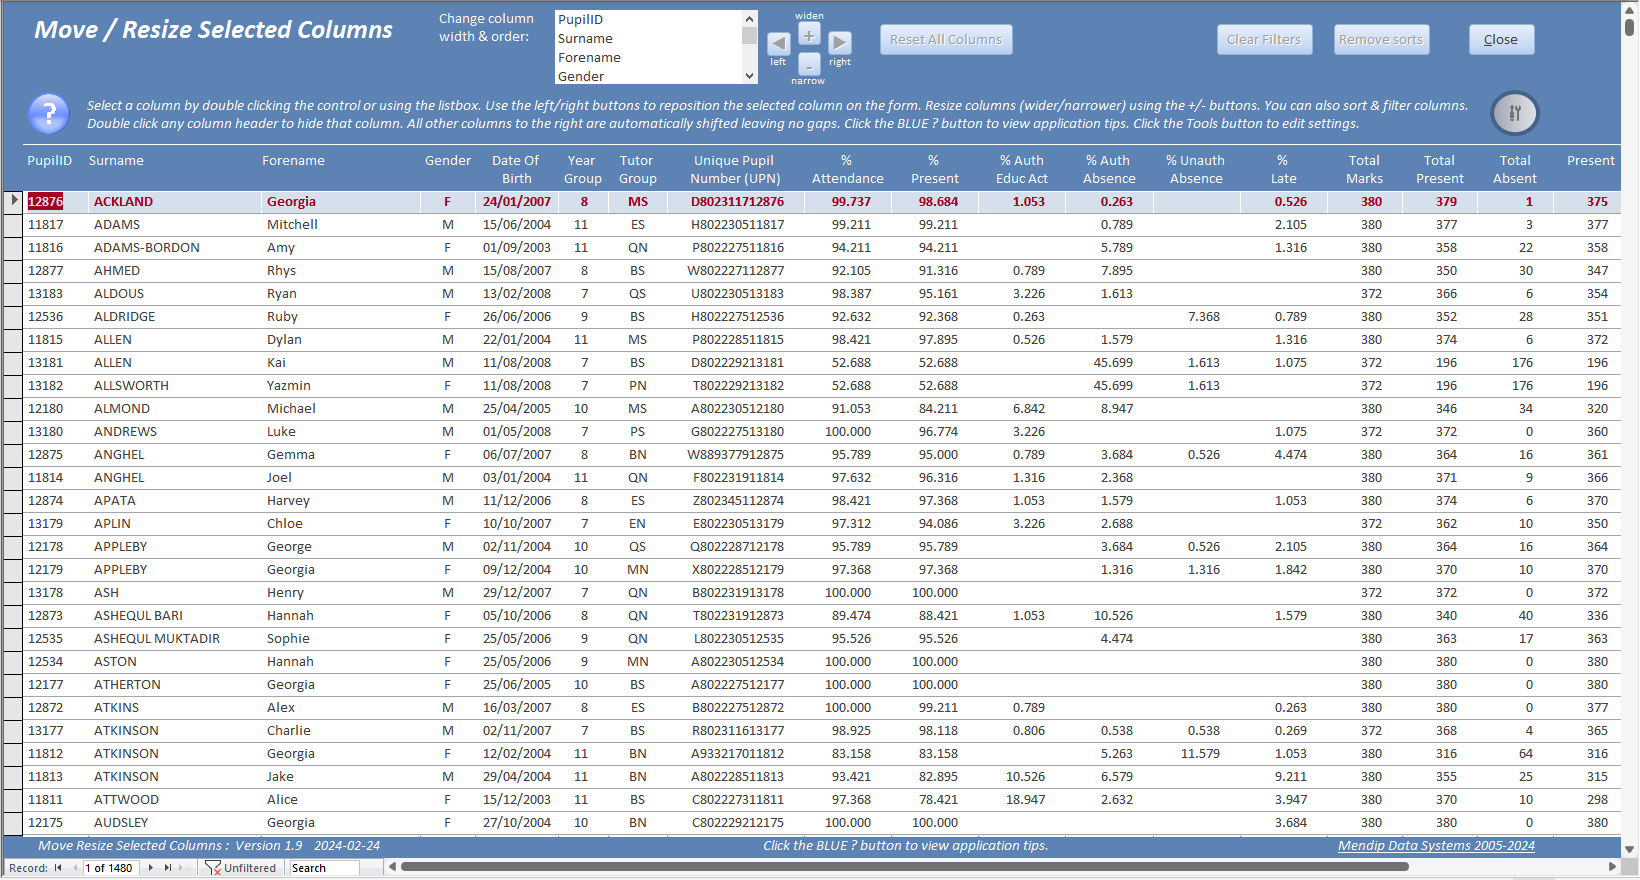
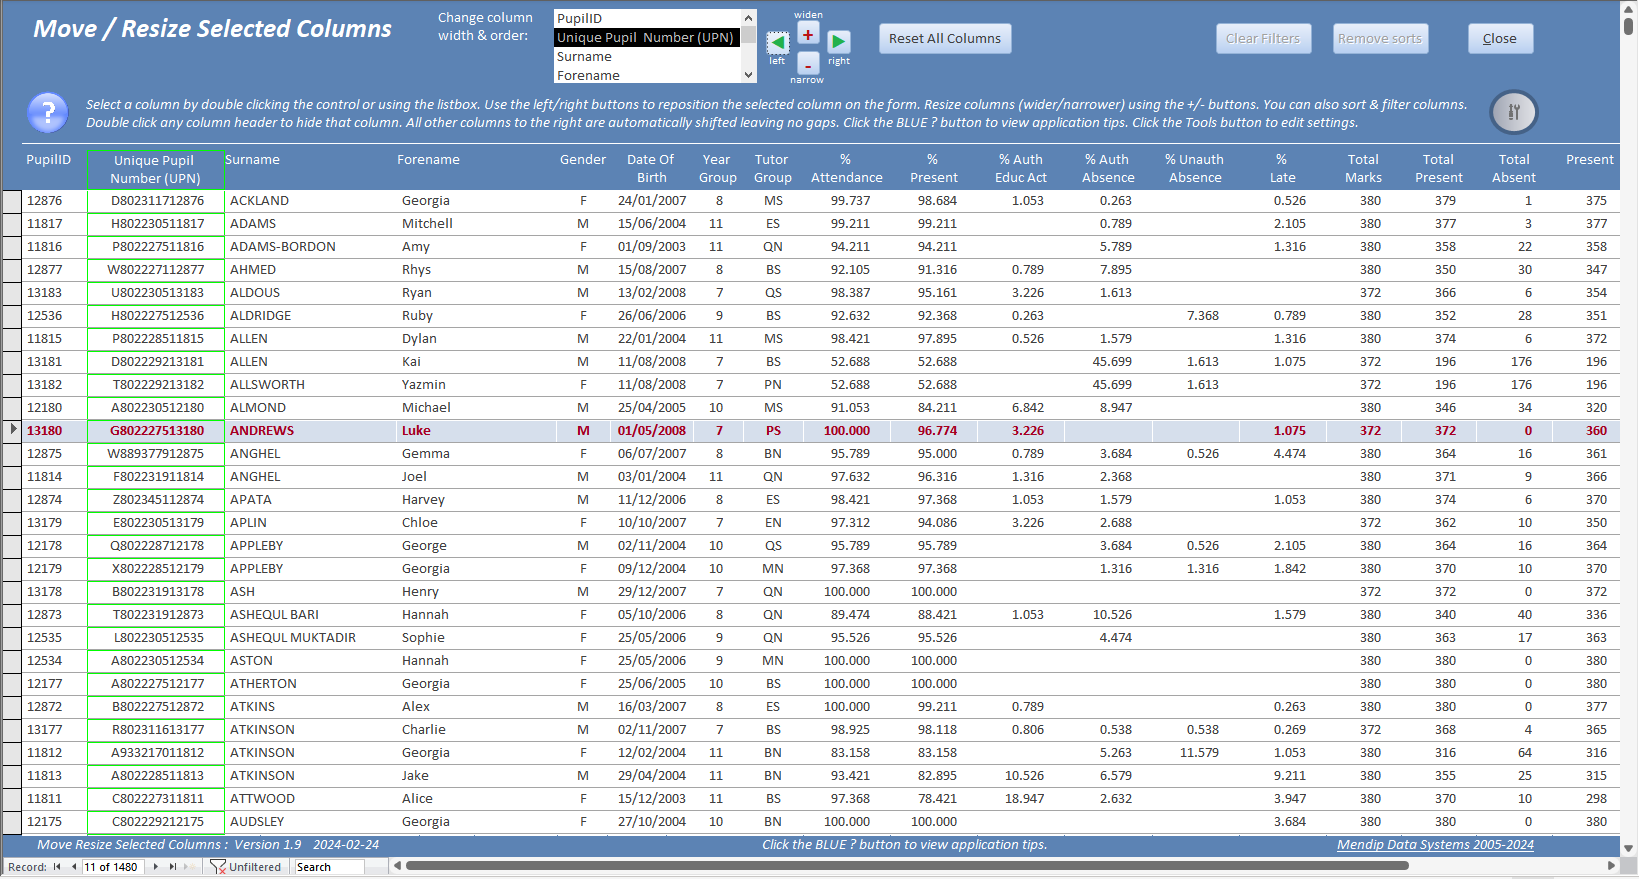
This application adds the ability to move and resize selected columns at runtime
In order to move or resize a column, it must first be selected. To do so, either select the column in the listbox or double click anywhere in the column.
The selected column border is then highlighted in CYAN and the 4 small buttons next to the listbox become enabled.
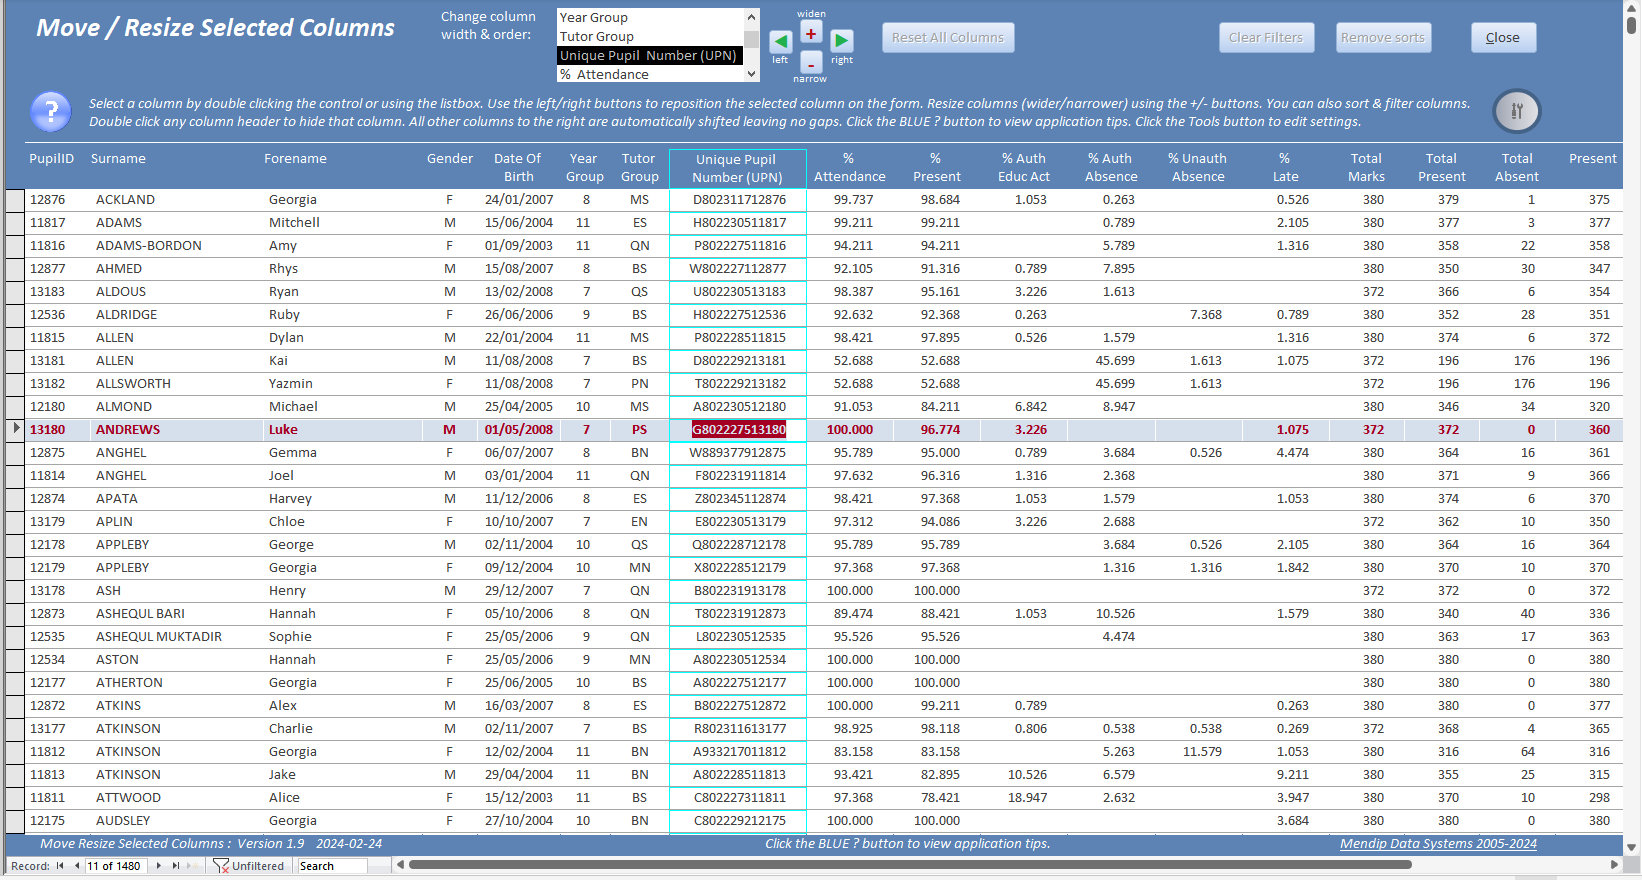
To move the selected column to the left or right, click the green left/right arrow buttons once or several times. The column border highlighting changes to GREEN.
After a short delay, the highlighting is automatically removed.
To make the selected column wider or narrower, click the red +/- buttons once or several times. The column border highlighting changes to RED.
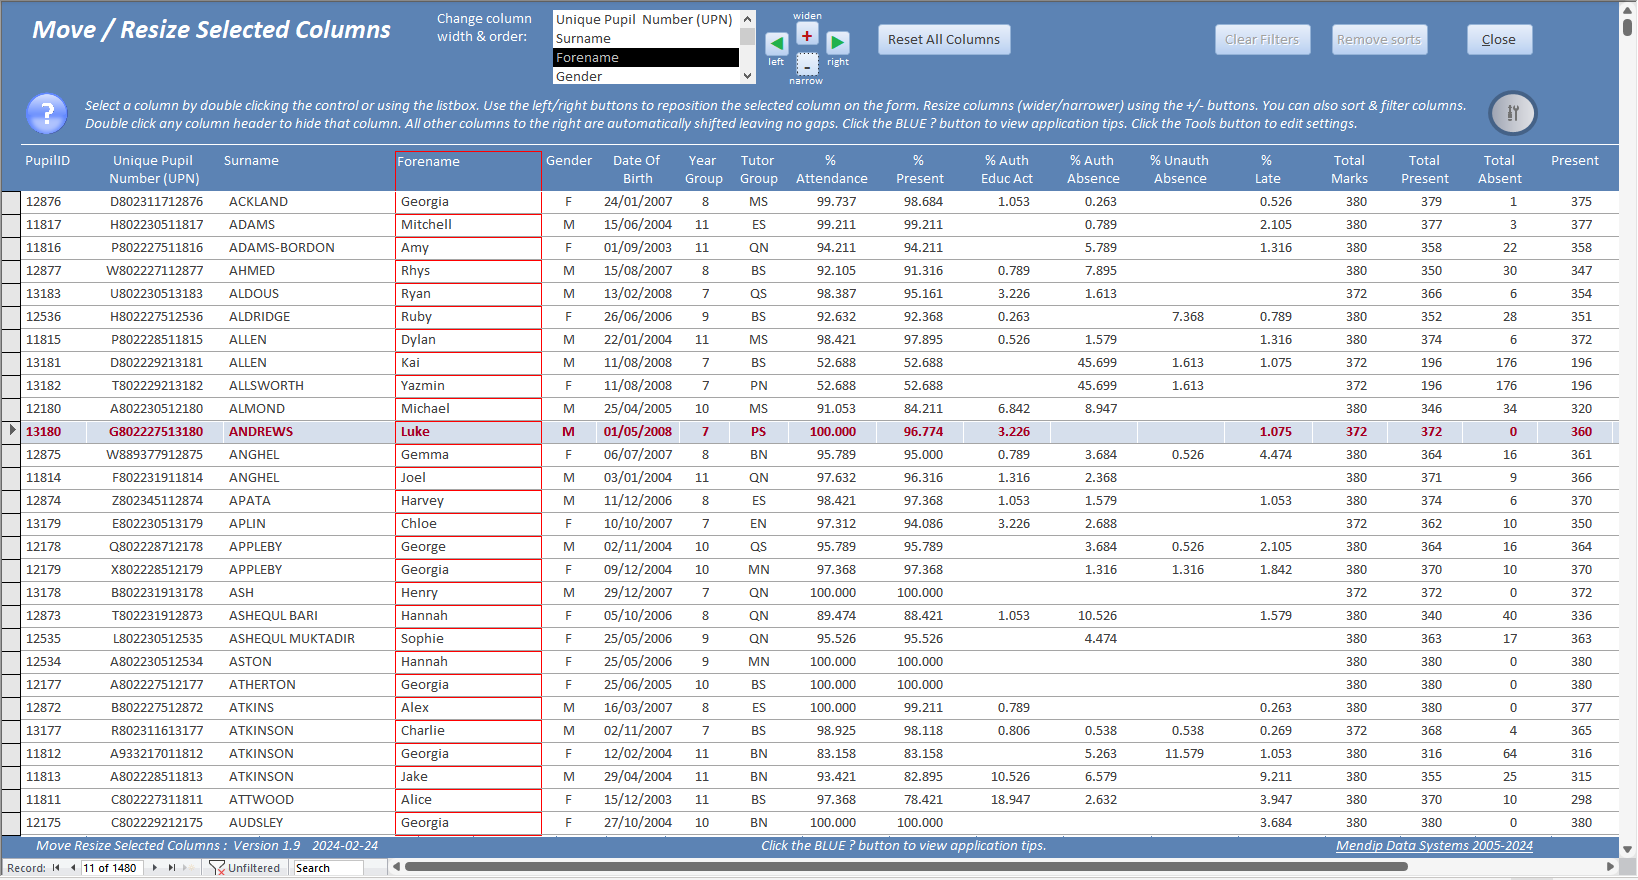
Once again, after a short delay, the highlighting is automatically removed.
In conjunction with double clicking any column header to hide it and filtering / sorting, the layout of the form can be significantly altered to suit personal preferences.
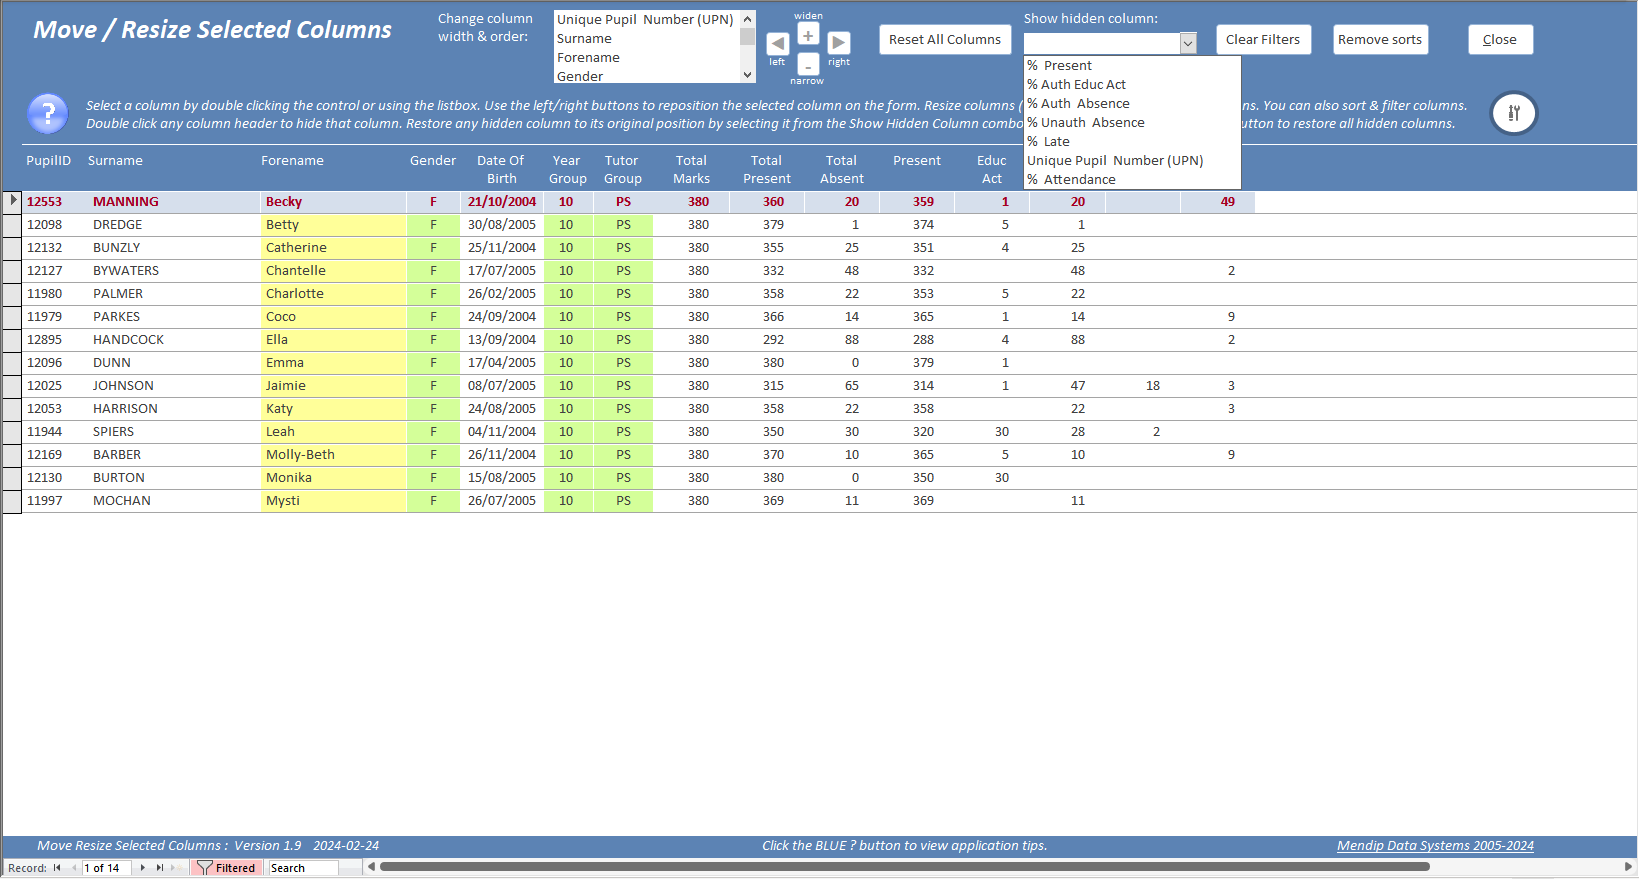
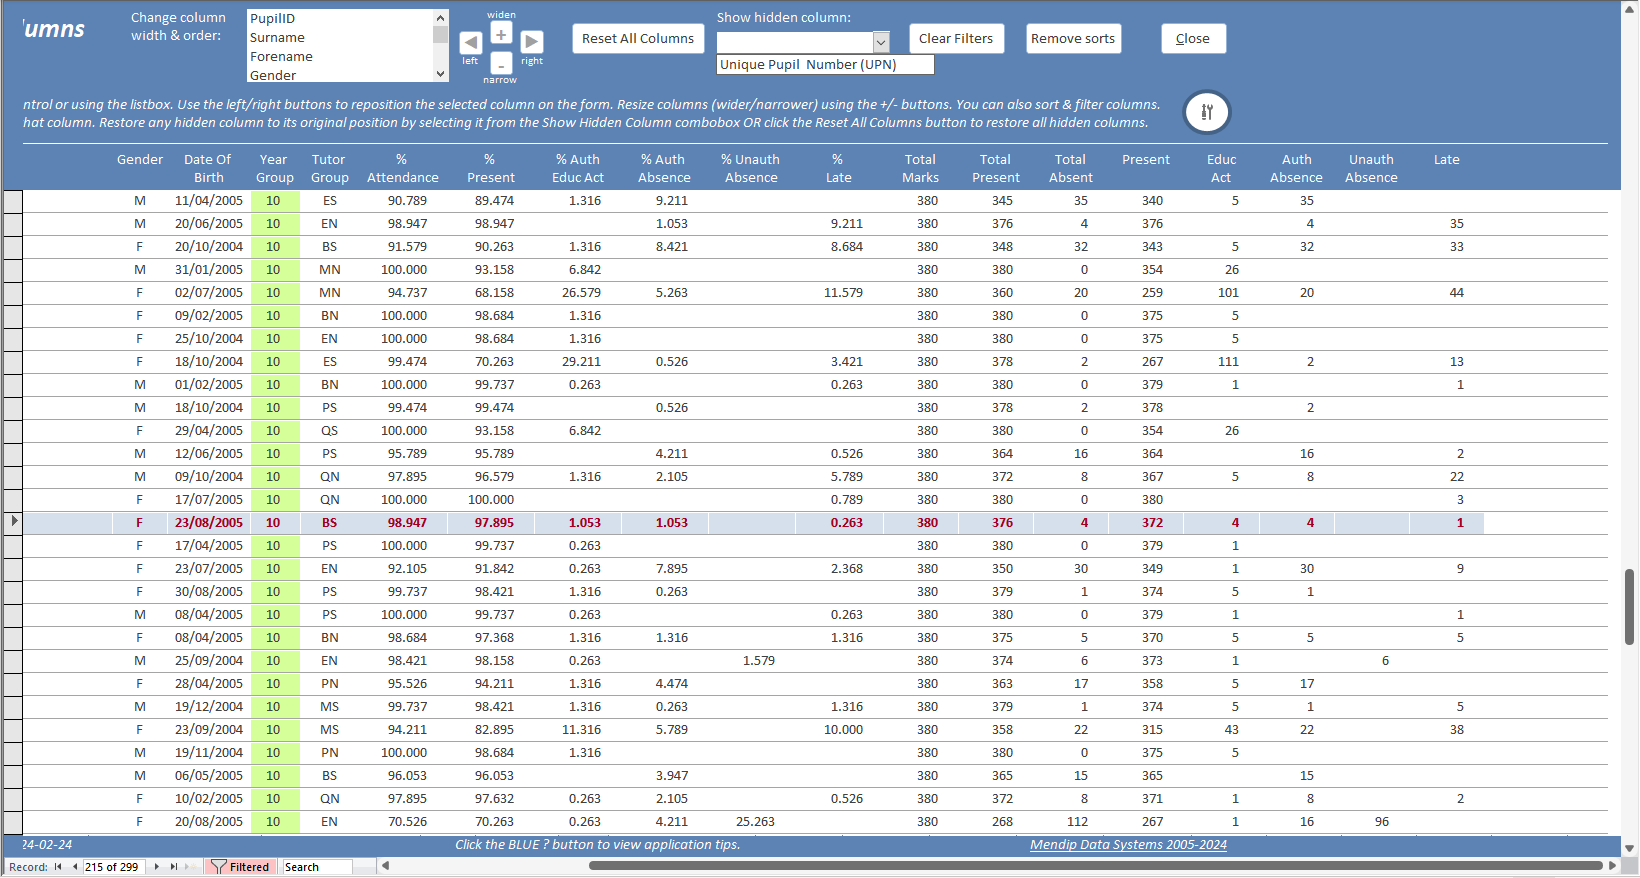
To restore an individual hidden column, select it in the Show Hidden Columns combobox.
Alternatively click the Reset All Columns button to make all columns visible again in their previous position.
Similarly click the Clear Filters and/or Remove Sorts buttons as necessary.
The form can be scrolled both horizontally & vertically as for any continuous form. If a different record is selected, the record highlighting moves automatically.
In this version, the modified layout cannot be saved for future use. When you click the Close button, you may see this message (depending on your settings):
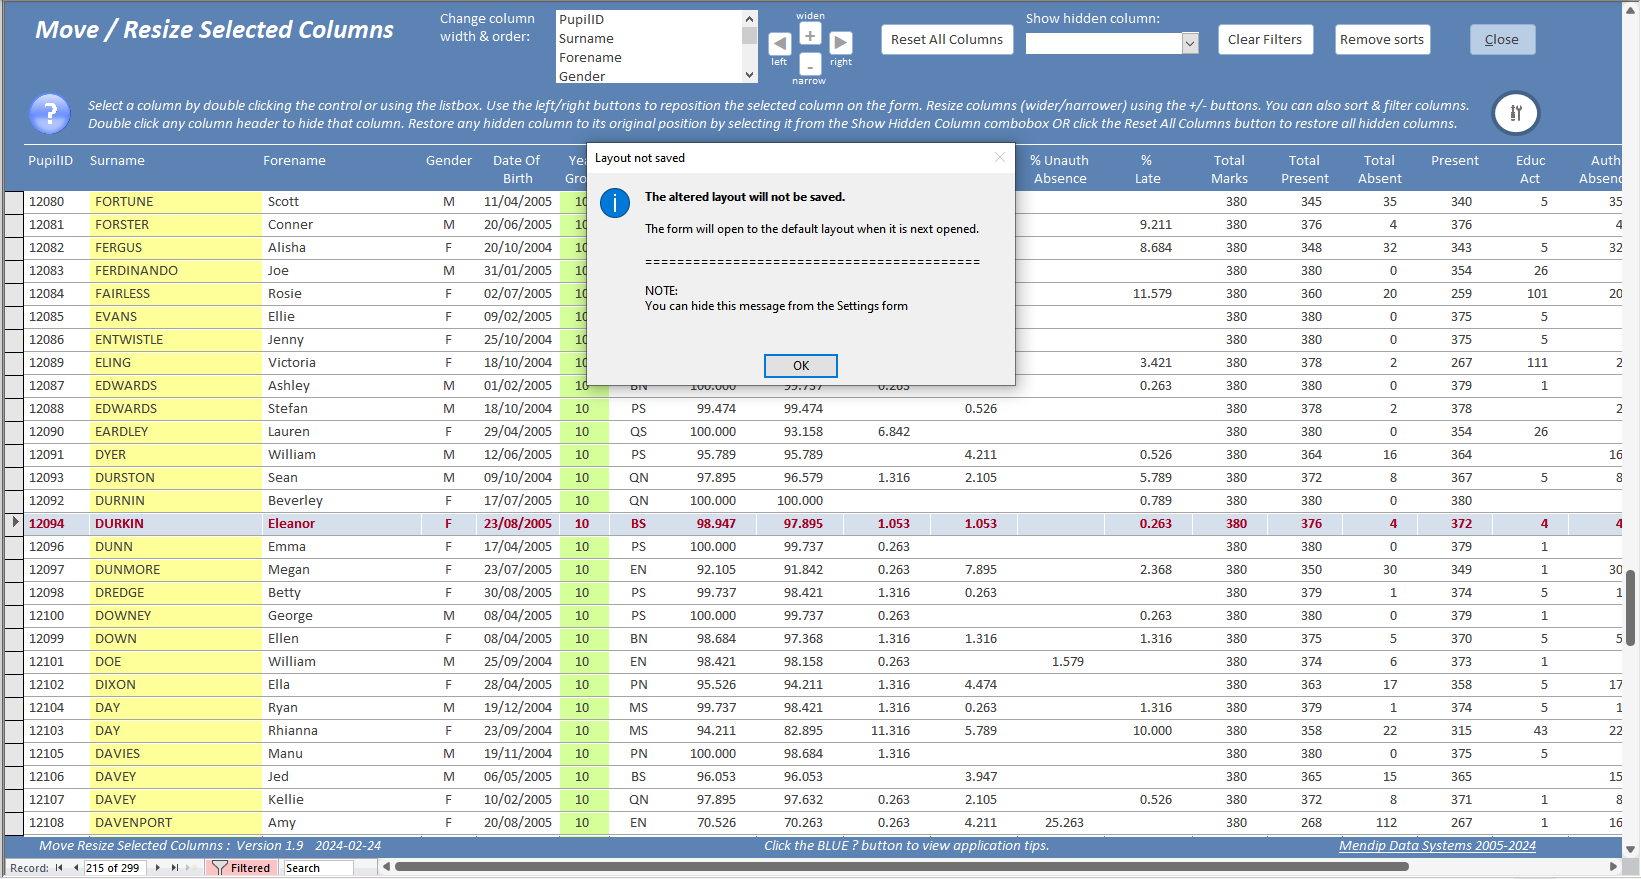
When the form is opened again, it will automatically revert to the original form layout.
Click the BLUE '?' button on the left to view a list of application tips for the various features in this application.
The Application Tips form is highlighted by dimming the background.
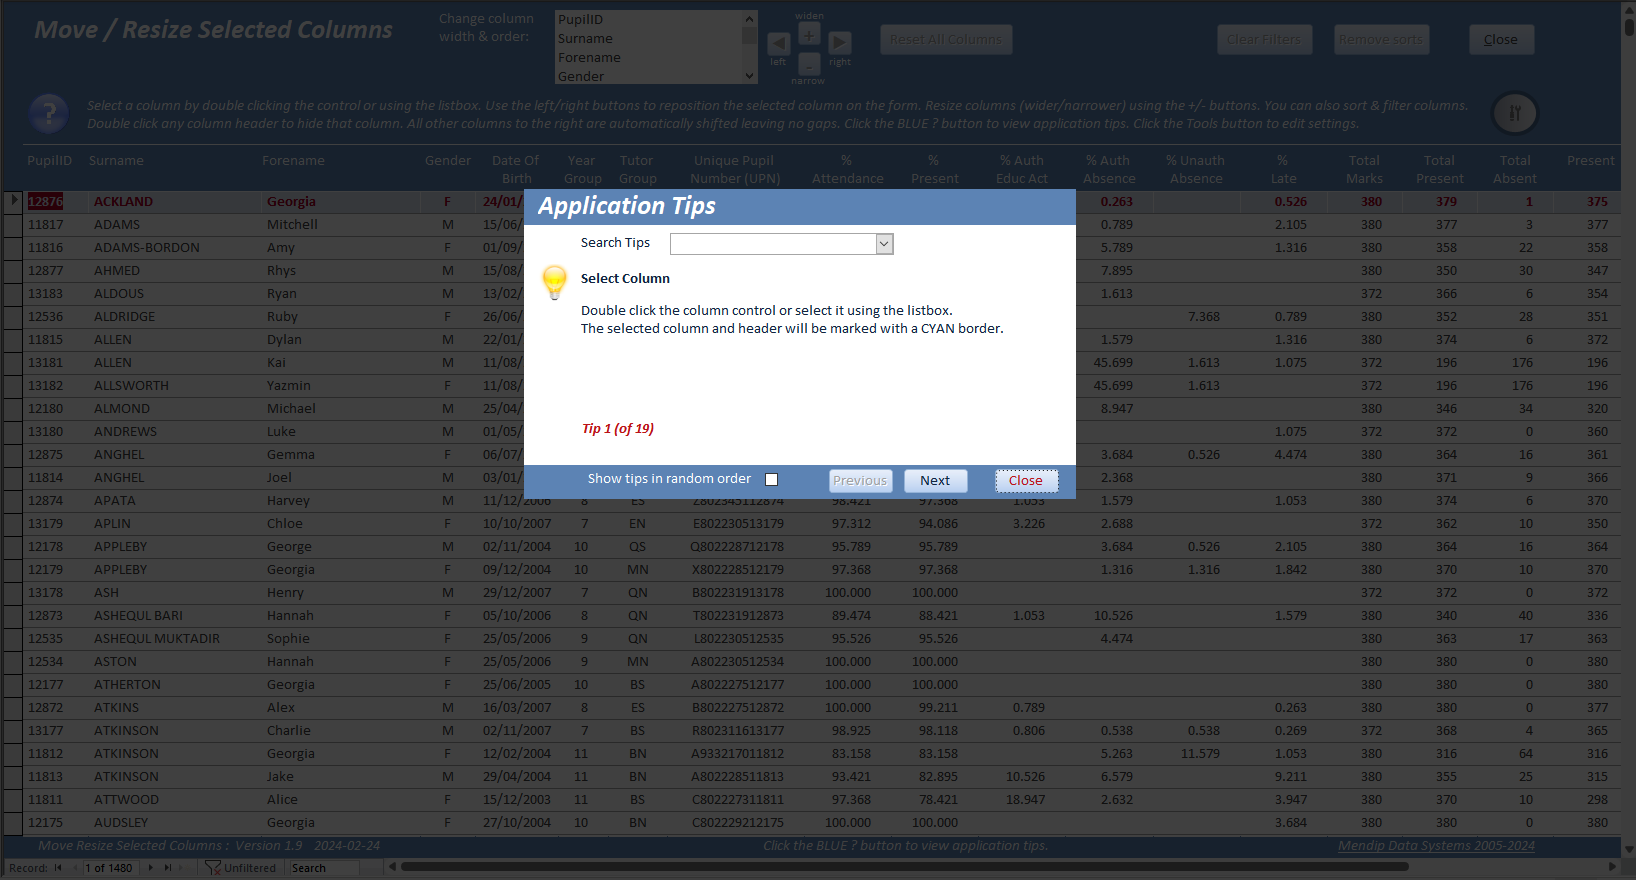
Use the combobox to search for a specific application tip.
When the application tips form is closed, the background appearance is automatically restored.
Click the 'Tools' button on the right to view / edit various application settings. Once again the background is dimmed
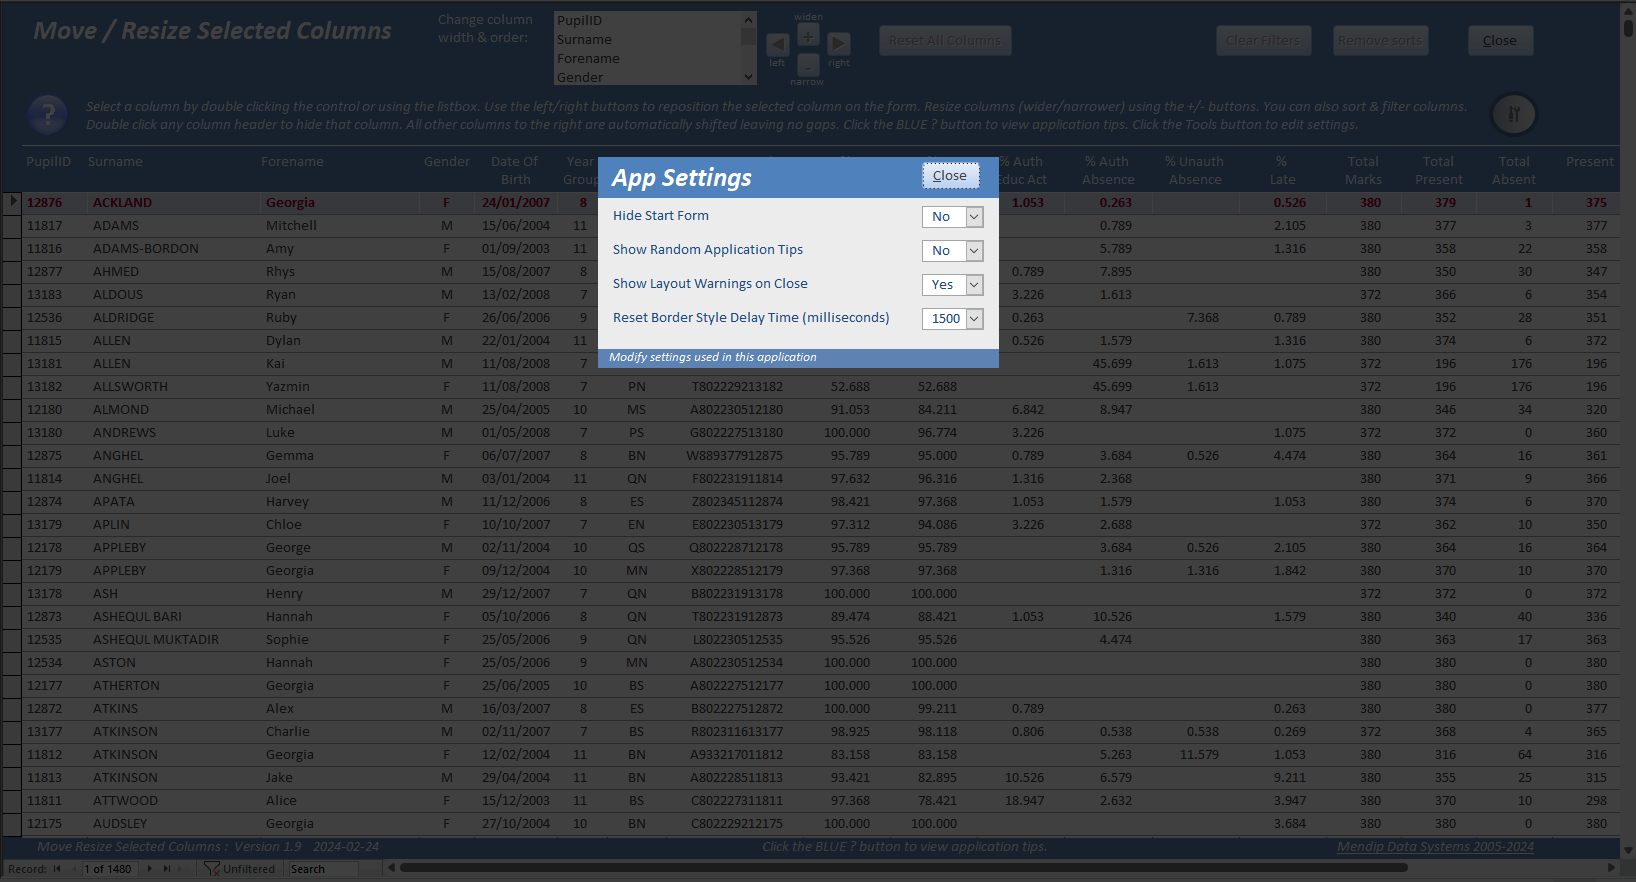
The various settings should be fairly self-explanatory:
a) Hide Start Form - set to Yes to open the app directly to the main form
b) Show Random Application Tips - set to Yes to view the tips in a randomly selected order ; set to No to use the default order
c) Show Layout Warnings On Close - set to No to prevent the warnings appearing in future
d) Reset Border Style Delay Time - the value here is the time in milliseconds before the border highlighting is removed.
The allowed range is 500 to 2500 with the default value = 1500 (1.5 seconds)
How Does the Example App Work? Return To Top
When a control is selected, either by double clicking or clicking on it in the listbox, this runs a procedure SelectControlInListbox.
This calls another procedure HighlightSelectedControl which creates the CYAN border around the control and label.
It also enables the 4 buttons used to reposition or resize the control.
Function SelectControlInListbox(frm As Form)
'Colin Riddington
'use to select control name in listbox when double clicking a control
frm.lstOrderColumns = GetLabelNameFromControl(frm.ActiveControl.Name)
HighlightSelectedControl frm
End Function
'---------------------------------------------------------------
Function HighlightSelectedControl(frm As Form)
'Colin Riddington
'used to highlight selected control after double clicking
'clear existing border formatting
For Each ctl In frm.Controls
If ctl.ControlType = acLabel Or ctl.ControlType = acTextBox Then ctl.BorderStyle = 0
Next
'get label & control name
labelName = frm.lstOrderColumns.Column(0)
controlName = GetControlNameFromLabel(labelName)
'set solid cyan border to control & label
frm(labelName).BorderStyle = 1 'solid
frm(labelName).BorderColor = vbCyan
frm(controlName).BorderStyle = 1 'solid
frm(controlName).BorderColor = vbCyan
'enable column control buttons
frm.cmdLeft.Enabled = True
frm.cmdRight.Enabled = True
frm.cmdWiden.Enabled = True
frm.cmdNarrow.Enabled = True
End Function
When the left arrow button, cmdLeft, is clicked, it runs the following procedure:
Private Sub cmdLeft_Click()
'Colin Riddington
'move selected column one position to left (move up in listbox)
MoveColumnLeft Me
'reset position of all other controls
ShowControlsInOrder Me
'enable reset button
cmdReset.Enabled = True
End Sub
The MoveColumnLeft function updates the control position to be one place higher in the listbox, changes the border colour to GREEN and updates the tab order.
Function MoveColumnLeft(frm As Form)
'Colin Riddington
Dim position As Long
Dim AddText As String
If IsNull(frm.lstOrderColumns.Column(1)) Then Exit Function
position = frm.lstOrderColumns.ListIndex
If position <= 0 Then Exit Function
AddText = frm.lstOrderColumns.Column(0) & ";" & frm.lstOrderColumns.Column(1)
frm.lstOrderColumns.RemoveItem position
frm.lstOrderColumns.AddItem AddText, position - 1
labelName = frm!lstOrderColumns.Column(0)
controlName = GetControlNameFromLabel(labelName)
'set solid green border to control & label
frm(labelName).BorderStyle = 1 'solid
frm(labelName).BorderColor = vbGreen
frm(controlName).BorderStyle = 1 'solid
frm(controlName).BorderColor = vbGreen
'update tab order
frm(controlName).TabIndex = frm(controlName).TabIndex - 1
End Function
The ShowControlsInOrder function loops through each control and label in turn and repositions them in the order specified in the listbox.
It also disables the border highlighting after a short delay as specified in the app settings.
Function ShowControlsInOrder(frm As Form)
'Xevi Batlle / Colin Riddington
On Error Resume Next
Dim I As Integer
Dim leftPosition As Long
leftPosition = 0
For I = 0 To frm.lstOrderColumns.ListCount - 1
labelName = frm.lstOrderColumns.ItemData(I)
controlName = Left(labelName, Len(labelName) - 6)
frm(labelName).Left = leftPosition
frm(controlName).Left = leftPosition
leftPosition = leftPosition + frm(controlName).Width
Next I
'run form timer event after specified delay - default = 1.5 seconds
'this event resets label & control border styles = transparent
frm.TimerInterval = GetResetBorderStyleDelayTime
End Function
The Reset button is also enabled to allow the change to be easily reversed if required.
Clicking the right arrow button, cmdRight, runs very similar code with the only difference being the MoveColumnRight function:
Private Sub cmdRight_Click()
'Colin Riddington
'move selected column one position to right (move down in listbox)
MoveColumnRight Me
'reset position of all other controls
ShowControlsInOrder Me
'enable reset button
cmdReset.Enabled = True
End Sub
The MoveColumnRight function updates the control position to be one place lower in the listbox, changes the border colour to GREEN and updates the tab order.
Function MoveColumnRight(frm As Form)
'Colin Riddington
Dim position As Long
Dim AddText As String
Dim strName As String
If IsNull(frm.lstOrderColumns.Column(1)) Then Exit Function
position = frm.lstOrderColumns.ListIndex
If position >= frm.lstOrderColumns.ListCount - 1 Then Exit Function
AddText = frm.lstOrderColumns.Column(0) & ";" & frm.lstOrderColumns.Column(1)
frm.lstOrderColumns.RemoveItem position
frm.lstOrderColumns.AddItem AddText, position + 1
labelName = frm!lstOrderColumns.Column(0)
controlName = GetControlNameFromLabel(labelName)
'set solid green border to control & label
frm(labelName).BorderStyle = 1 'solid
frm(labelName).BorderColor = vbGreen
frm(controlName).BorderStyle = 1 'solid
frm(controlName).BorderColor = vbGreen
'update tab order
frm(controlName).TabIndex = frm(controlName).TabIndex + 1
strName = frm.Name
End Function
Clicking the cmdWiden button (RED +) again runs very similar code:
Private Sub cmdWiden_Click()
'Colin Riddington
If IsNull(Me!lstOrderColumns.Column(1)) Then Exit Sub
'make selected control & label 100 twips wider
WidenSelectedColumn Me
'reset position of all other controls
ShowControlsInOrder Me
'enable reset button
cmdReset.Enabled = True
End Sub
The WidenSelectedColumn function changes the border style to RED and increases the width of both control and label by 100 twips (approx 0.18 cm or 0.07 inch).
It then loops through all controls to the right of the selected control and moves those by the same amount to the right.
Code is used to handle error 2100 in the case where the form reaches the maximum width allowed in Access.
Function WidenSelectedColumn(frm As Form)
'Colin Riddington
On Error GoTo Err_Handler
Dim lngOldWidth As Long
labelName = frm!lstOrderColumns.Column(0)
controlName = GetControlNameFromLabel(labelName)
If Nz(controlName, "") <> "" Then
lngOldWidth = frm(labelName).Width
'set solid red border to control & label
frm(labelName).BorderStyle = 1
frm(labelName).BorderColor = vbRed
frm(controlName).BorderStyle = 1
frm(controlName).BorderColor = vbRed
'increase widths by 100 twips
frm(labelName).Width = lngOldWidth + 100 'label
frm(controlName).Width = lngOldWidth + 100 'corresponding control
End If
'move all controls to right of selected control by 100 twips to the right
For Each ctl In frm.Controls
If (ctl.ControlType = acLabel Or ctl.ControlType = acTextBox) And ctl.Tag <> "A" Then
If ctl.Left > frm(labelName).Left Then
ctl.Left = ctl.Left + 100
End If
End If
Next
Exit_Handler:
Exit Function
Err_Handler:
If Err = 2100 Then
MsgBox "The form cannot be made any wider", vbInformation, "Maximum width"
Else
MsgBox "Error " & Err & " in WidenSelectedColumn procedure: " & Err.Description
End If
Resume Exit_Handler
End Function
Similarly clicking the cmdNarrow button (RED -) runs almost identical code.
Private Sub cmdNarrow_Click()
'Colin Riddington
If IsNull(Me!lstOrderColumns.Column(1)) Then Exit Sub
'make selected control & label 100 twips narrower
NarrowSelectedColumn Me
'reset position of all other controls
ShowControlsInOrder Me
'enable reset button
cmdReset.Enabled = True
End Sub
The NarrowSelectedColumn function changes the border style to RED and reduces the width of both control and label by 100 twips (approx 0.18 cm or 0.07 inch).
It then loops through all controls to the right of the selected control and moves those by the same amount to the left.
Code is used to handle error 2100 in the case where the control cannot be made any narrower.
Function NarrowSelectedColumn(frm As Form)
'Colin Riddington
On Error GoTo Err_Handler
Dim lngOldWidth As Long
labelName = frm!lstOrderColumns.Column(0)
controlName = GetControlNameFromLabel(labelName)
If Nz(controlName, "") <> "" Then
lngOldWidth = frm(labelName).Width
'set solid red border to control & label
frm(labelName).BorderStyle = 1
frm(labelName).BorderColor = vbRed
frm(controlName).BorderStyle = 1
frm(controlName).BorderColor = vbRed
'reduce widths by 100 twips
frm(labelName).Width = lngOldWidth - 100 'label
frm(controlName).Width = lngOldWidth - 100 'corresponding control
End If
'move all controls to right of selected control by 100 twips to the left
For Each ctl In frm.Controls
If (ctl.ControlType = acLabel Or ctl.ControlType = acTextBox) And ctl.Tag <> "A" Then
If ctl.Left > frm(labelName).Left Then
ctl.Left = ctl.Left - 100
End If
End If
Next
Exit_Handler:
Exit Function
Err_Handler:
If Err = 2100 Then
MsgBox "The control cannot be made any smaller", vbInformation, "Minimum width"
Else
MsgBox "Error " & Err & " in NarrowSelectedColumn procedure: " & Err.Description
End If
Resume Exit_Handler
End Function
All the other code used in the form is described in the related articles linked above.
A reminder that, in this version, the layout is not saved when the form is closed.
However that functionality is provided in the updated version available with the second part of this article.
Version History Return To Top
v1.9 27/02/2024 (Page 1 of this series of articles)
Initial release. Layout not saved when the form is closed
v2.1 28/02/2024 (Page 2 of this series of articles)
Added functionality to optionally save the modified layout for future use
More Continuous Form Examples
Return To Top
The following articles provide further examples of functionality added to continuous forms:
• Highlight Current Record
• Highlight Selected Control or Column
• Highlight Filtered Columns
• Add Multiselect Filter (2 pages)
• Paint Me Transparent (Selectively Hide Controls)
• Sort columns
• Hide duplicate values in a column (as for reports)
• Hide & Restore Selected Columns (2 pages)
• Freeze Columns (3 pages)
• Move and Resize Columns (2 pages)
Feedback
Return To Top
Please use the contact form below to let me know whether you found this article interesting/useful or if you have any questions/comments.
Please also consider making a donation towards the costs of maintaining this website. Thank you
Colin Riddington Mendip Data Systems Last Updated 27 Feb 2024
Return to Example Databases Page
Page 1 of 2
1
2
Return To Top
|
|
|